Over a year ago I was standing in the aisle looking at models with one of my sons, I was plotting a take home of P-61 kit as he was going stealth and grabbing a B-25 kit I had remarked was next on my list. We made it all the way to the checkout and before I noticed he had the kit under his arm. It was a few days before my birthday and he handed it to me outside and said “here ya go”. Accompanied with some diorama bits he said “you always need some sticks and rocks” I still haven’t started the P-61.
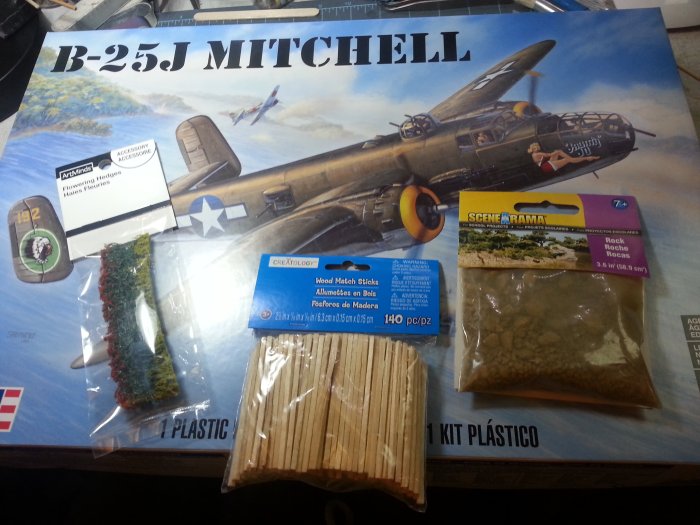
This is an old kit as far as molds go and being a Revell offering I know there won’t be a lot of detail and some fitting and tweaking will be in order. The upside of this leaves a lot of latitude to do some scratch building to bring it around. I enjoy kits that require modelling and not just neat tidy assemblies. I like being tested and challenged making my way through the journey and research, learning and replicating. The kit comes with a few details for inside the fuselage but the bomb bay and few other areas are left a bit blank.
Like most projects I go first at research, find pics of the real scheme and tons of interior and exterior pics. This helps me fill in the blanks and make a plan. I spend a lot of time before and during building and painting here: https://www.nationalmuseum.af.mil/Visit/Virtual-Tour/Cockpit360/
The Mitchell B-25 has 4 views there where you can get inside the aircraft and move around. This really helps with picking out some of the detail not provided in even the best kits. I understand there are some smart phone apps out there that has even more aircraft than just ones there at the USAF Museum. I also have a few digital versions of “Walk Around” books to refer to. I also find myself at Cyber Modeler often during projects. If you haven’t been to there yet it is well worth a look for reference on Aircraft and Armor. Here is the B-25 page: https://www.cybermodeler.com/aircraft/b-25/b-25_all.shtml
I won’t go into every detail of the build just what little things I did to make this one the way I wanted.

Getting started I pulled out the main parts of the cockpit. Making use of my rivet wheel tool to start adding some detail to the floor. Install the kit bits and primed with Vallejo black. I like getting that black base so when I go over with the Green Chromite, I can vary my coats and use that base as a built-in shading. I had a p-39 that needed some paint while I had the green out.

I painted up the wires, belts, hoses and boxes with mix of Vallejo Model Color black/grey/violet. The gauges got a dry brush of silver to liven up the rings on the bezels after flat black. Various dry brushing and washes were used on the rest of the interior after a 1:1 Vallejo satin varnish.

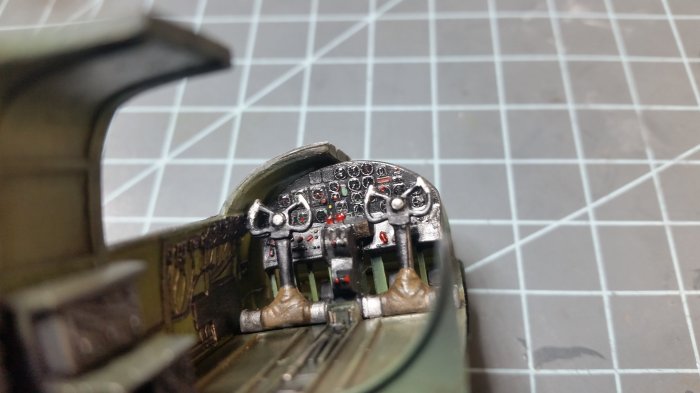
The kit was absent of any decals for cockpit so I was on my own again, following pics to get colors right. I followed up by hitting each gauge with few drops of Vallejo Gloss varnish to simulate glass. Take a few rounds, if too much is put on it tends to not be as see-thru.
I treated the nose and tail to same regiment of primer, paint, detail washes, varnish. A few dry Vallejo pigments were used to add some dust and vary some shades of the cockpit green.
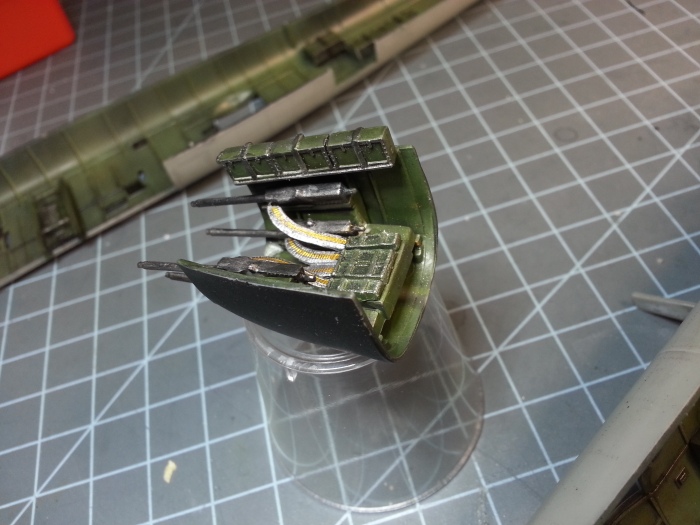

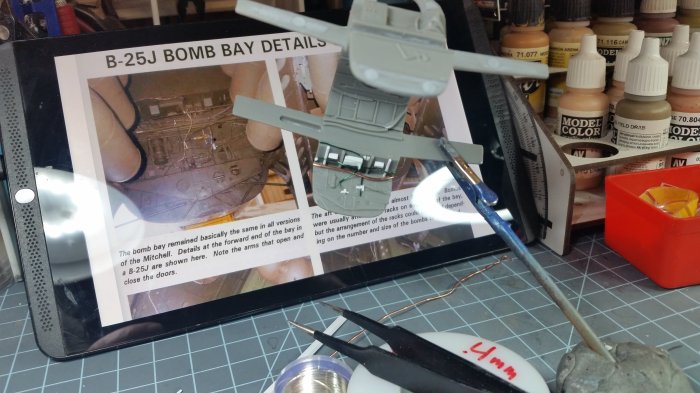
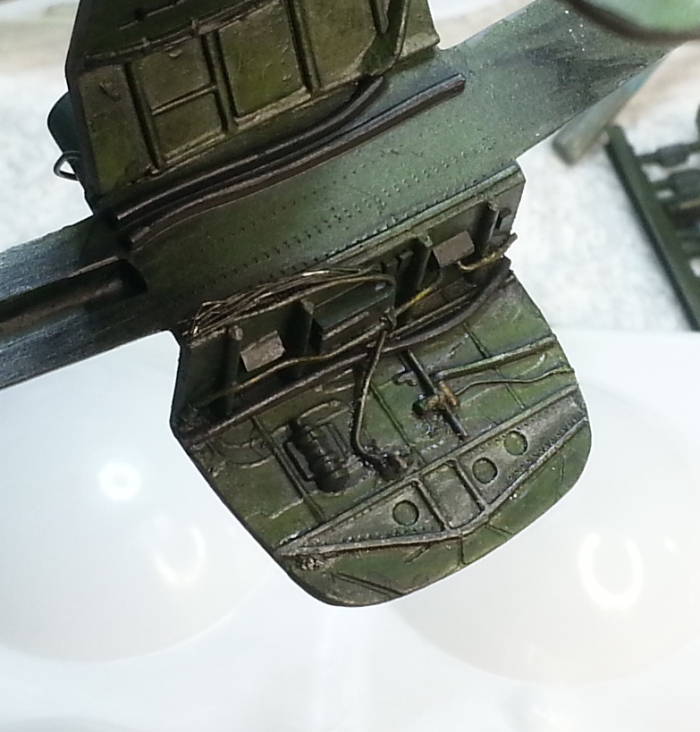
Looking at the bomb bay and comparing to images I pulled out my box of scrap wires and got to work.

I studied a few pics as I went along, the bomb racks themselves needed help, the details busied up the bay.


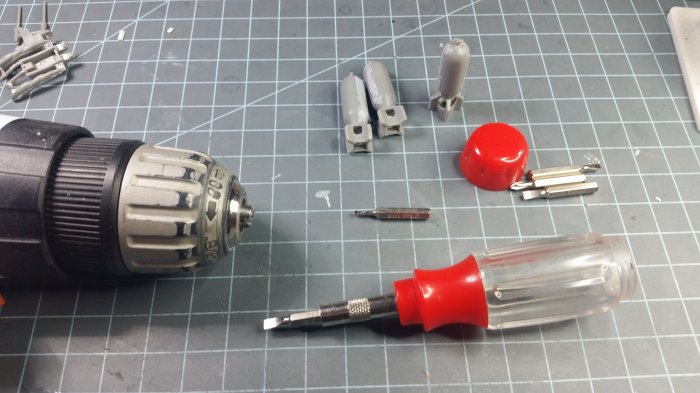

Did my best on the bombs to get them straight while gluing but when one of two sides of circle is really an oval thing just don’t work out. My cordless drill is really my hobby bench lathe/mill and all-around buddy for things like this. Using a bit, I was able to spin the bombs and get them true with some kind words and putty.


Using masking tape as a guide and also a way to keep my sharp rivet wheel from wandering I added rivets to the entire aircraft. The results add a bit more detail to a kit like this.
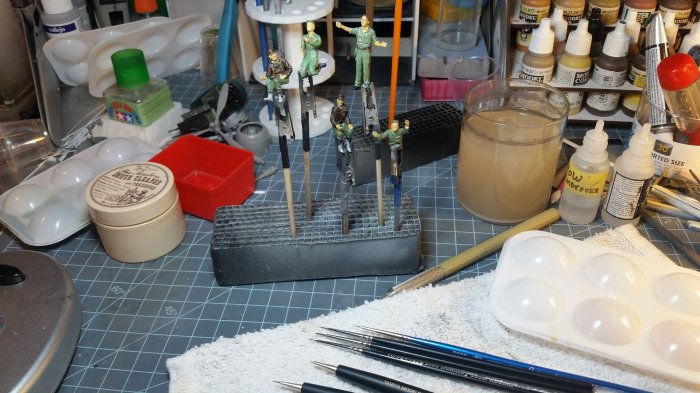


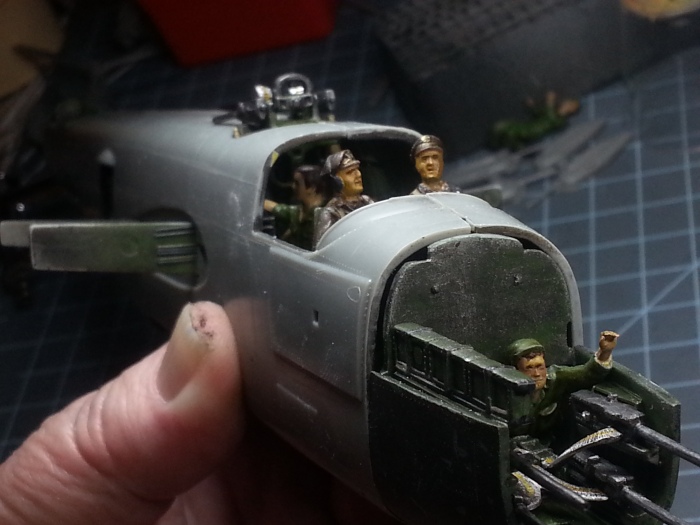


The kit had a few figures but I went digging, I wanted a crew. A couple head transplants and genetic engineering I assembled some guys and got them painted up. The pilot looks a lot like Jimmy Stewart to me, who, incidentally was a B-24 pilot during WW2. My goal was to build this all wheels up and happy I can have some crew seen through the glass now.
Finished up tail section, masked the windows and closed it all up.

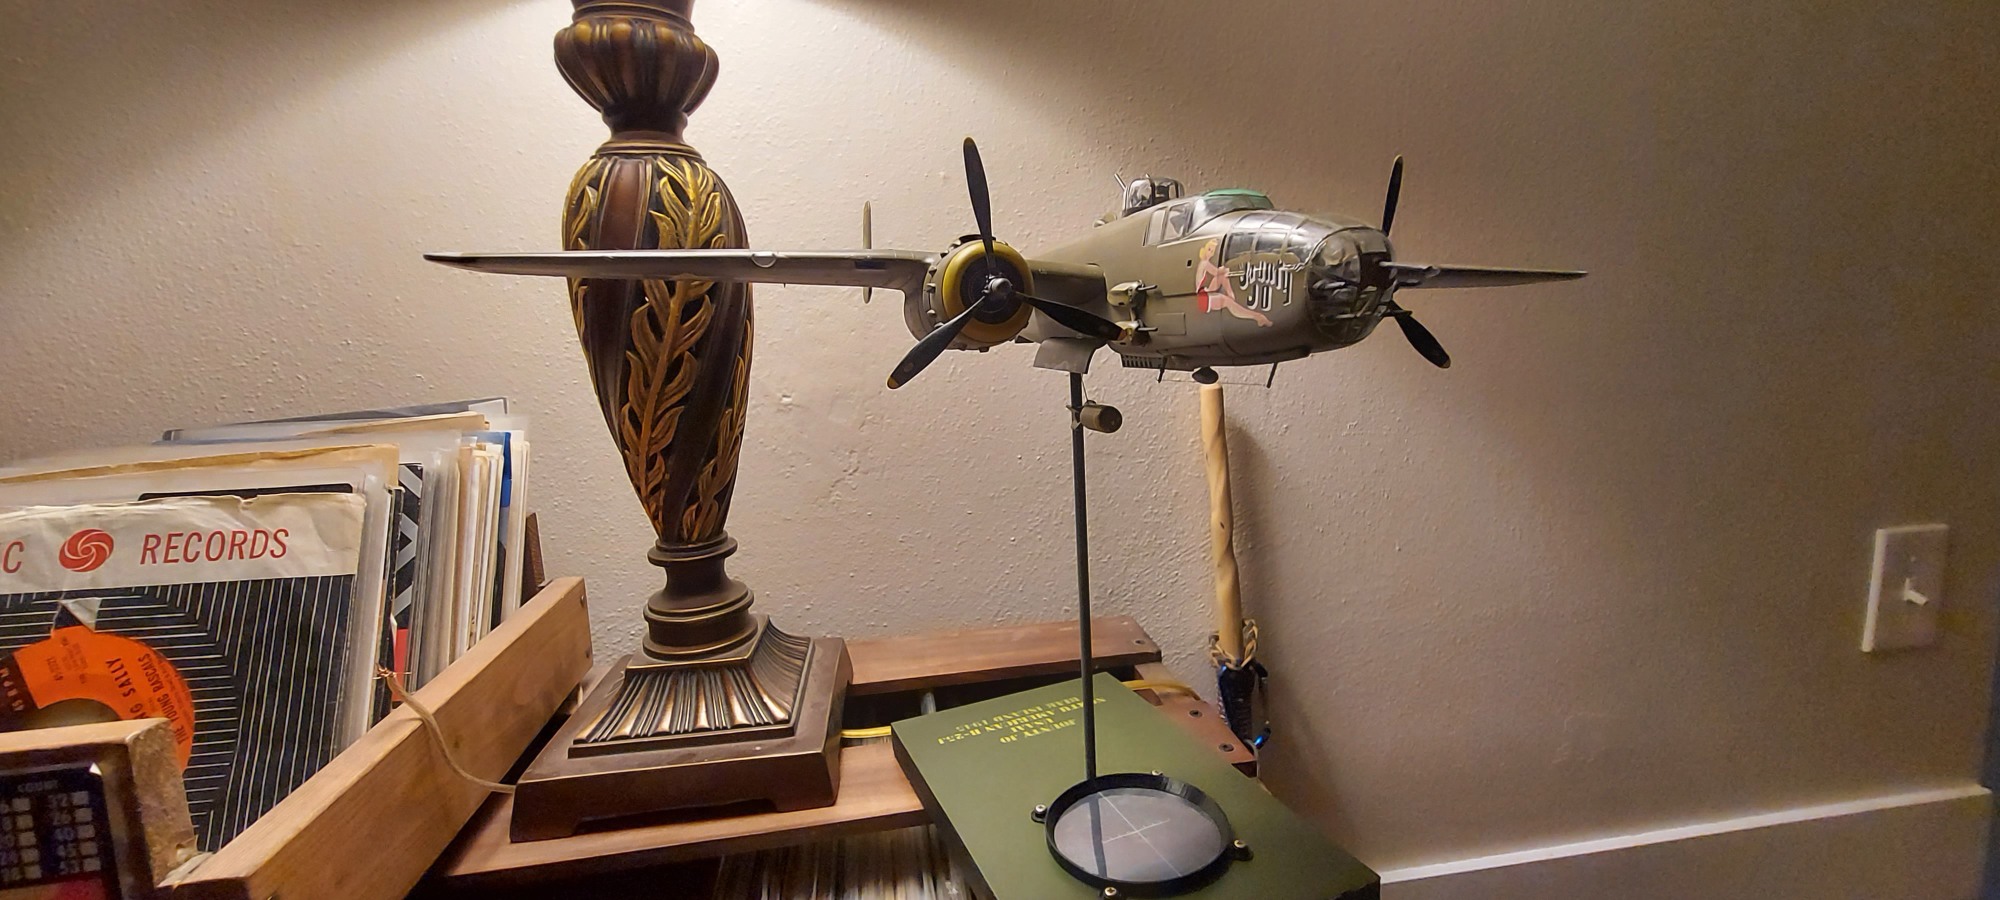
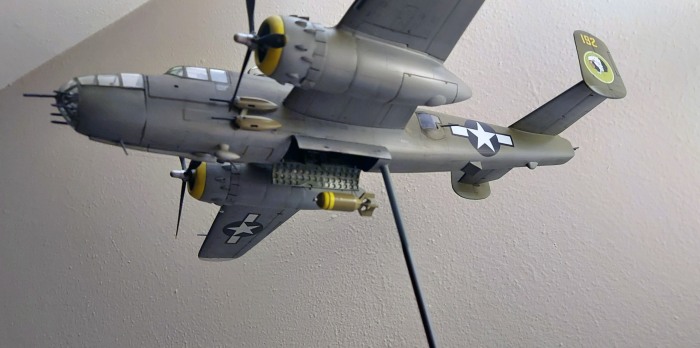
I took to the kit for the paint scheme with Olive Drab on top and a sea gray on the underside. Gave it some chipping here and there. Kit decals went along great with a few trips to the decal solve to get Jo to sit down. I was planning on hanging this but ideas of a stand started happening. Everything was hit with Vallejo Matt varnish. I always love the moment you pull off masking tape and get to see all that stuff you forgot you added.


I fashioned a piece of guitar string into a bomb and the bay to simulate one being dropped, this again started me thinking of a base.

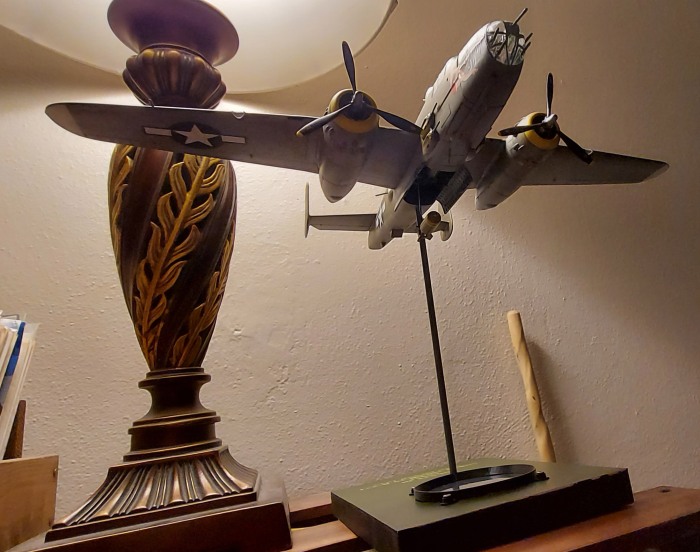
I cut a piece of ½” X 5” x 8” particle board and added some basswood edging to hide the cheap board. I installed a tube inside plane carefully to act as receptacle for a brass rod. Likewise, a hole was drilled into the board. I cut a piece of styrene tube and painted it to go over the brass rod. Each end of rod was burred so plane can be removed but doesn’t spin around.


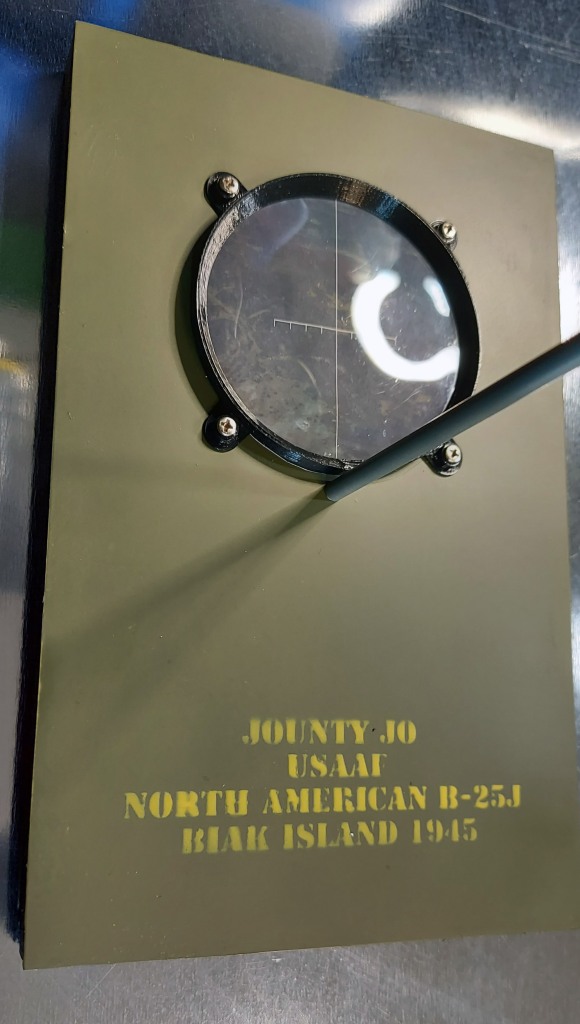
I browsed the internet for an image looking through a bomb site and sized it up in Photoshop to fit my board. A bezel ring was very easy to find on Thingiverse.com to size up to fit my image and 3D print. I cut a piece of clear plastic scrap for the bezel lense.

I painted the board up Green Drab and figured out where I would place the bomb sight. I wanted to make some sort of title emblem for it so back to photoshop to make an image of text. Next I took the saved .jpg image and ran it through this website converter: https://anyconv.com/jpg-to-stl-converter/ – Then I could open the .stl file to size up to 3D print and use as a stencil.
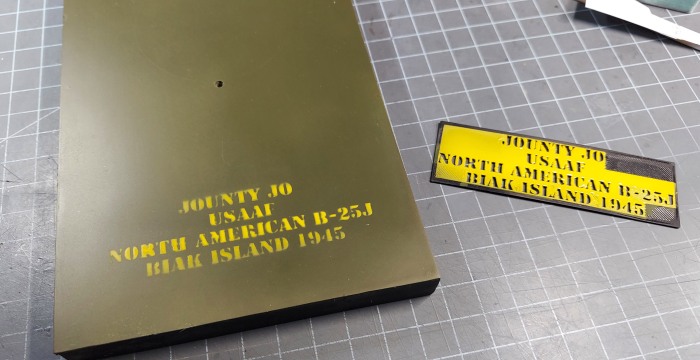
Here are the results and I must say I am happy with it, should live to be passed onto my son.


Like most 50-year-old kits, molds and a fair amount of these Revell kits can present some challenges but all that can be minimal compared to the pleasure found in the journey of just modeling the crap out of it.
- Hobby Dude

Very nice work on an old classic!
LikeLike
Jaw dropping detail, love it!
LikeLike